HOW TO CREATE A VM?
Initially, as in most important things, you have to press the big bright
button! 
Step 1: Select the operating system you want for your VM
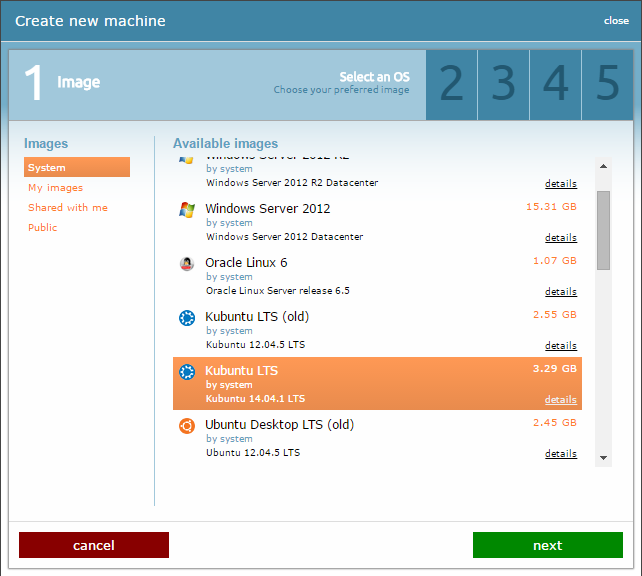
You can choose between Windows 2008/2012 Server Edition or various Linux and *BSD distros (with or without a GUI).
Step 2: Depending on the OS you have selected, ~okeanos has preselected some of the VM's characteristics. If you want, you can change them now!
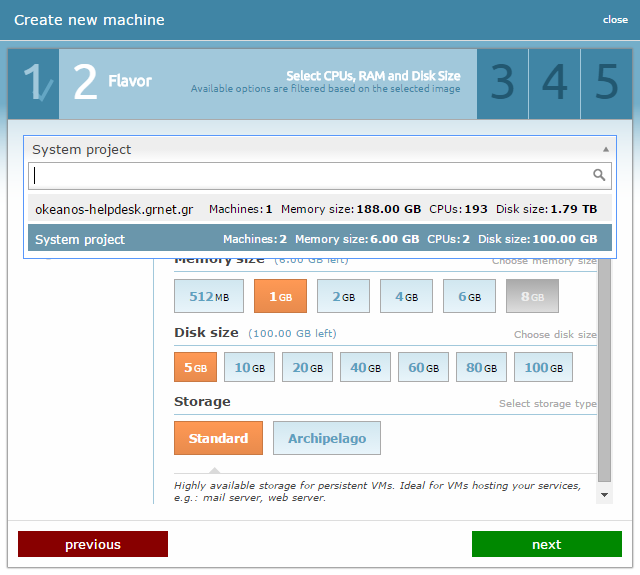
You can select how many cores your processor will have, how many GB of RAM your system will boast , or the size of your disk drive. Alternatively, you can simply choose the power scale of your VM, i.e. Small, Medium or Large.
You can also choose between two storage types:
- "Standard", which is the default and safest choice. It uses DRBD i.e. RAID 1 over network and has been proved rock-solid.
- "Archipelago", which is our custom storage layer that offers smart data redundancy as well as very fast VM creation times. For the more tech-savvy, we provide technical details in our blog post about it. Note that Archipelago is still in experimental phase and therefore, more suitable for non-critical environments.
Step 3: Connect your VM!
In this step, you are presented with many network choices such as attaching a floating IP to your VM, adding your VM to a private network etc.
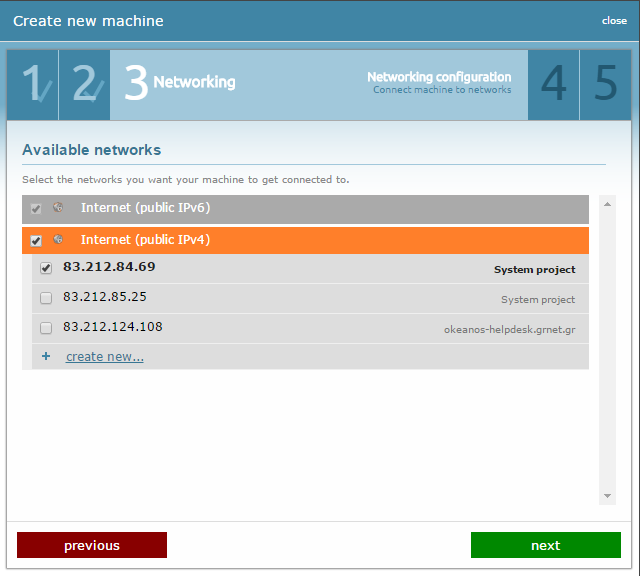
This window is separated in two parts. The top part is where your available public IPv4 addresses are listed and which you can attach to your VM. Also, you can create more IPs, provided that your quotas allow you to, by pressing the "create new" button.
The bottom part should list your private networks, if your have created any. You can connect your VM to any of these networks simply by choosing them.
Note: You can edit any of the above choices later on from the IP menu or the private networks menu.
Step 4: Name your VM!
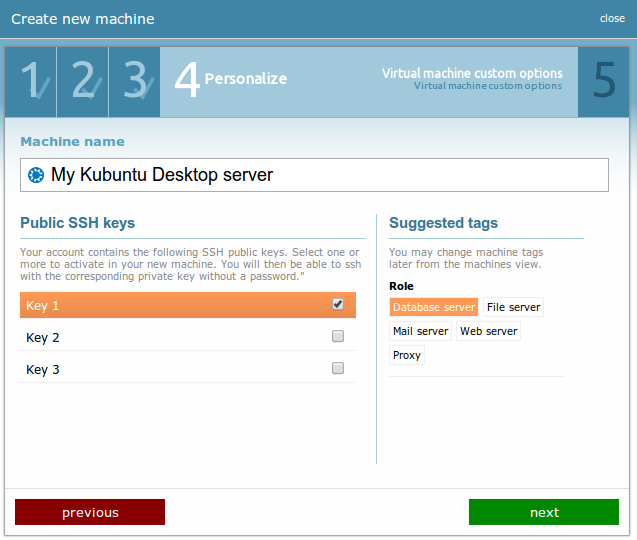
At this point, you can name your VM and give it a role (MailServer, Proxy, etc.). The above do not affect the VM you create. They merely help you with categorizing your arsenal of VMs!
As for the ssh keys, they can be regarded as your "fingerprint", large alphanumeric sequences that allow you to access remote machines without ever having to enter your username/password. More details about the process of creating these keys can be found in our SSH keys section.
Step 5: Confirmation
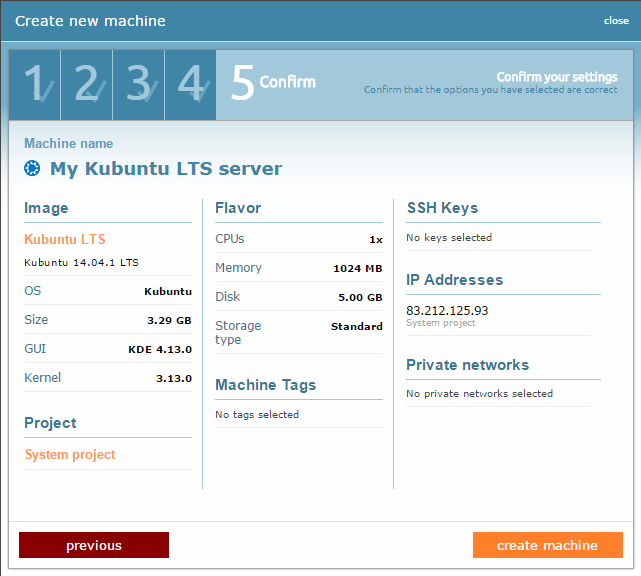
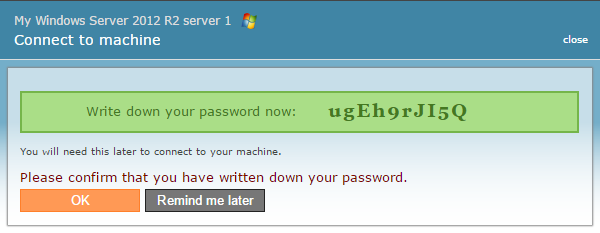
At this point you will see a summary of your choices. If everything seems fine to you, by clicking the "create machine" button, your order will be processed and your VM will be available in no time! Of course, do not forget to save the password that will appear on your screen, since for security reasons there is absolutely no other way to retrieve it if you confirm that you have written it down. Otherwise you can select to write your password down later but keep in mind that the password will be available only for a short time. In order to retrieve it later, just click on your VM's icon and a pop-up window with the password will appear.
CYCLADES USER GUIDE
- How to create a VM?
- How do I connect to a VM?
- How do I manage my VM?
- How can I resize the CPU/RAM of an existing VM?
- How can I attach/detach an IP on a running VM?
- How can I add extra disks to my VMs?
- How can I detach an extra disk from a VM?
- How can I add tags to my VMs?
- How can I assign my VM to a project?
- What are SSH keys and how can I use them?
- What are private networks?
- What is a firewall and which one should I choose?
- How to create VMs from custom images?
- How can I access all my VMs using one public IP (NAT)?
- How can I update the VirtIO drivers of my Windows VM?
- How can I add IPv6 nameservers on my CentOS/Oracle Linux VM?