PROJECTS
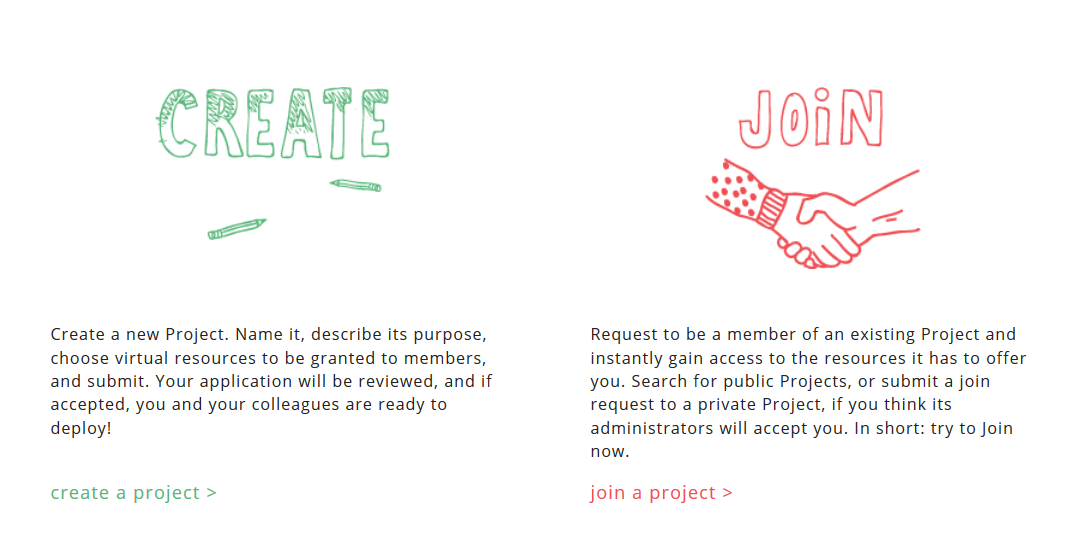
The "Projects" tab allows you to request a specific amount of resources. You can create a new project application, become the owner of it and invite more members to join or instead join an existing project on ~okeanos.
How to create a new project?
The project application consists of 4 steps:
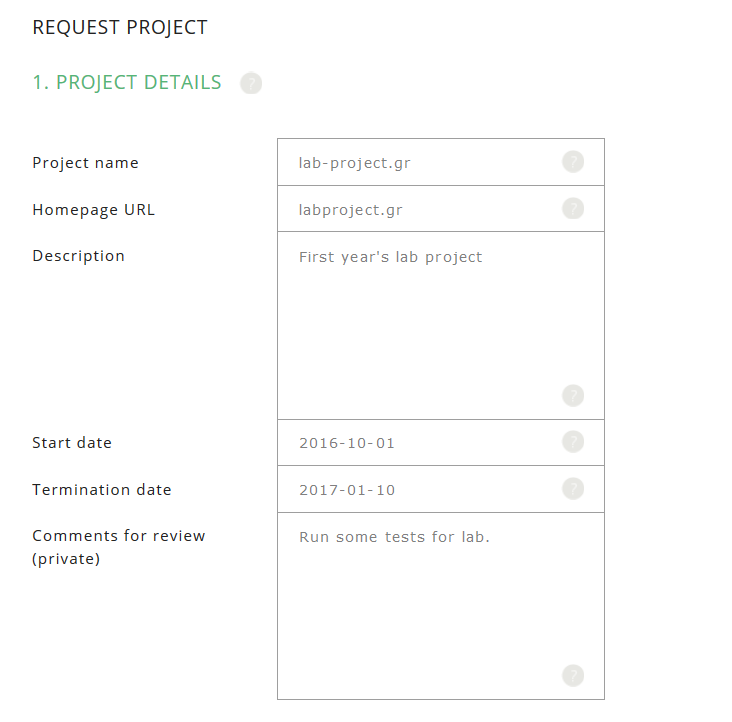
Step 1: Enter the main project details.
- First select a name for your project in a domain format and then give the homepage URL that points at your project's site.
- Add a short description so anyone knows what the project is about.
- When is your project going to start? Pick the start date that you need your project to be created.
- Select the termination date of the project. Keep in mind that at this date the project will be automatically terminated and its resource grants will be revoked from all members.
- Last but not least, write any comments that you wish to be considered during the review process. Don't worry...the comments are private and will not be made public.
Step 2: Choose the membership options.
You should choose what the joining and leaving policy will be and the maximum number of members that are allowed to join your project. When someone joins the project he could be automatically accepted or wait for owner's acceptance. Same policies are applied in leaving the project as well. However, in that case you are also able to choose that the members could not leave the project.

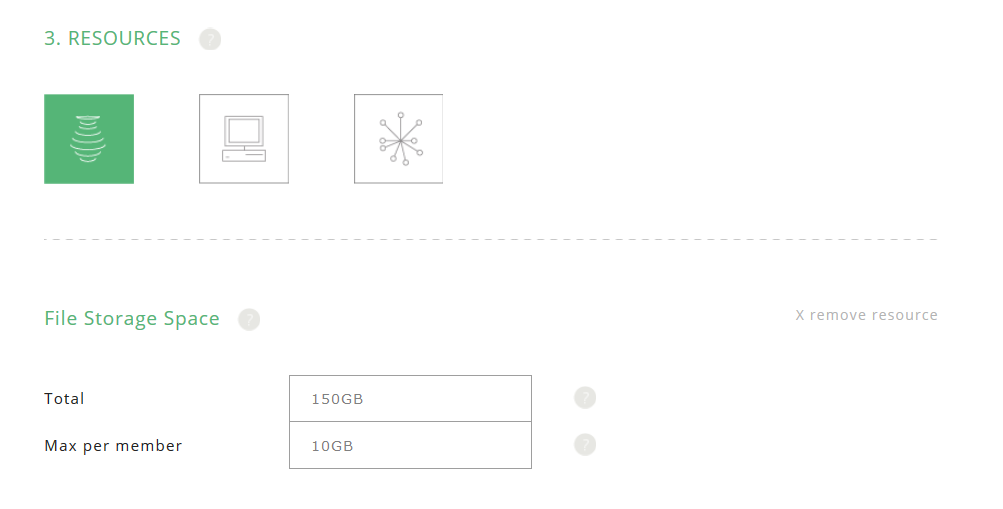
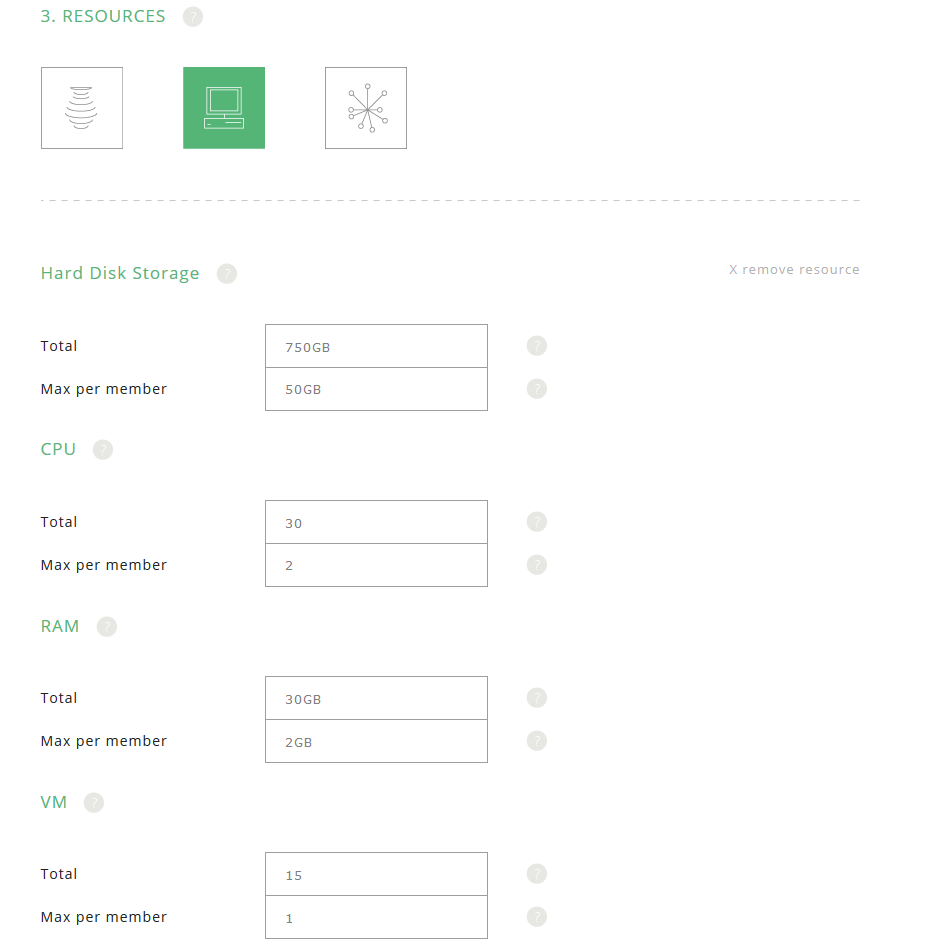
Step 3: Add your storage, compute and network resources.
You may select the total storage, compute and network resources that are required for your project. In addition, you can specify the total amount of resources that each member of the project can use. However, don't be greedy with the resources and ask what you really need!
NOTES:
- While selecting the File Storage Space, the Hard Disk Storage or the RAM that you want to be granted, you should also specify the units. For example you may ask 10GB or 20MB of File Storage Space.
- Keep in mind that the minimum required disk space required to create a VM is 5GB and the minimum equivalent for RAM is 512MB so don't request less than that.
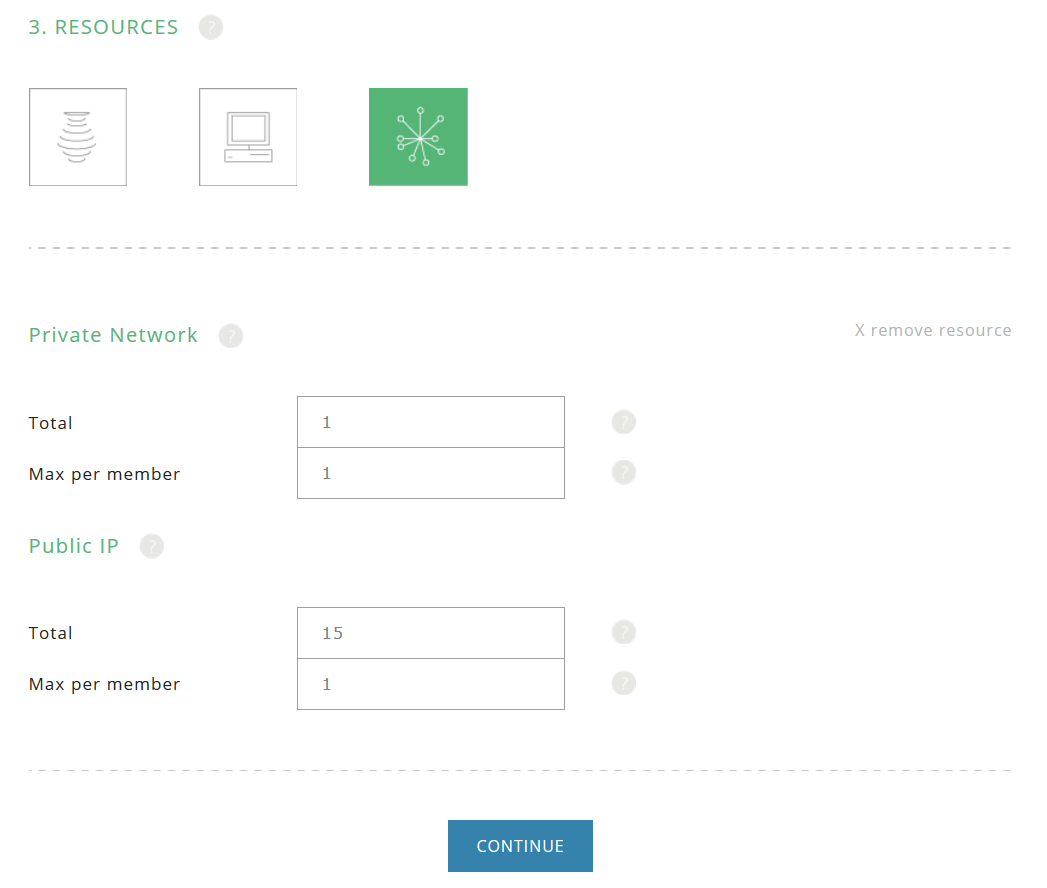
To continue you must press the 'Continue' button.
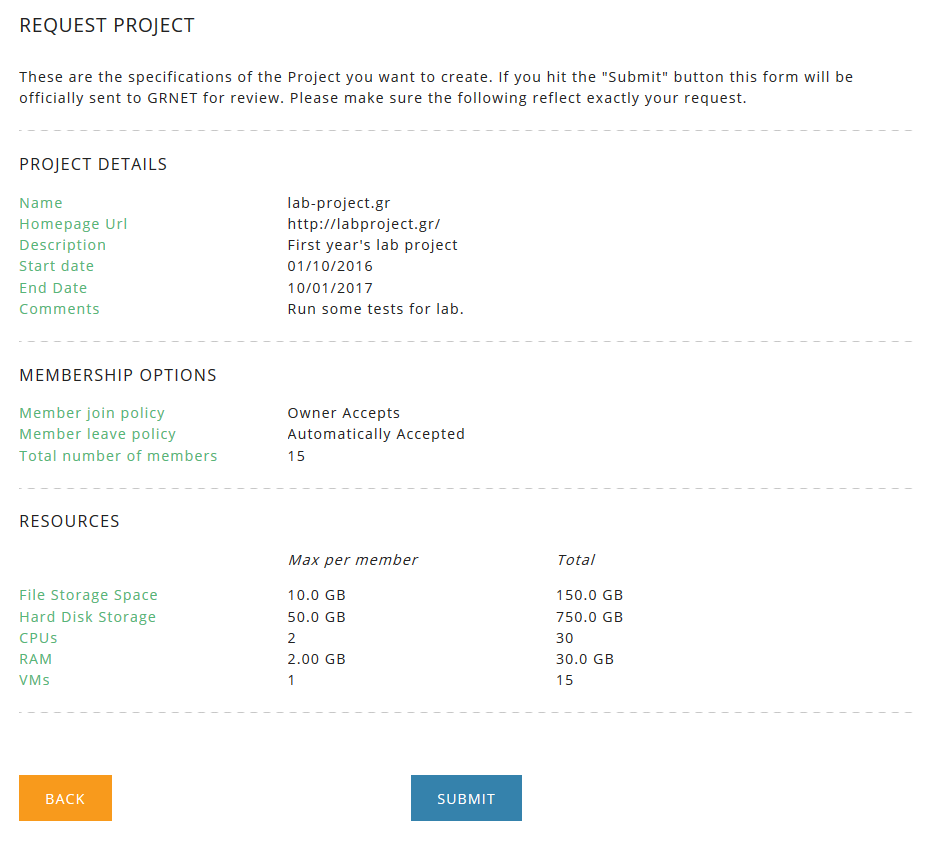
Step 4: Submit your project application.
One click to go and here you will see a brief summary of the project's specifications. If no changes are required, just hit the 'Submit' button.
That's it! Your application has now been sent to get reviewed.
NOTE: It should be mentioned that each project application is reviewed manually in relation to the needs of each user, the reasons for requesting the additional resources and the availability of resources each time. Therefore, there in no average waiting time for project approval. In any case you are advised to fully document the resources that you have requested and be patient.
How to modify an active project?
Supposing that you own an already active project, you can also ask for modifications. Select your project from the "Projects" tab and click on the "MODIFY" option right below the project's name.
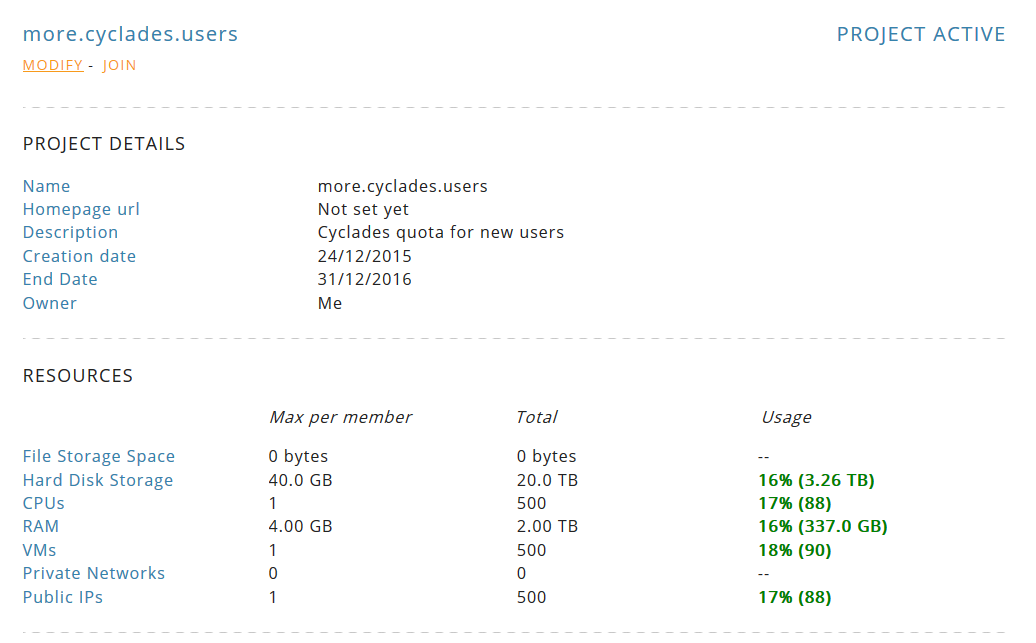
You can then request the modifications that you want. Just remember that like any new project application, it will get reviewed as soon as possible.
How to cancel a project application?
While your project application is pending review you have the option to cancel your application. To do so, select your project from the "Projects" tab and click on the 'CANCEL PROJECT APPLICATION' option right below your project's name.
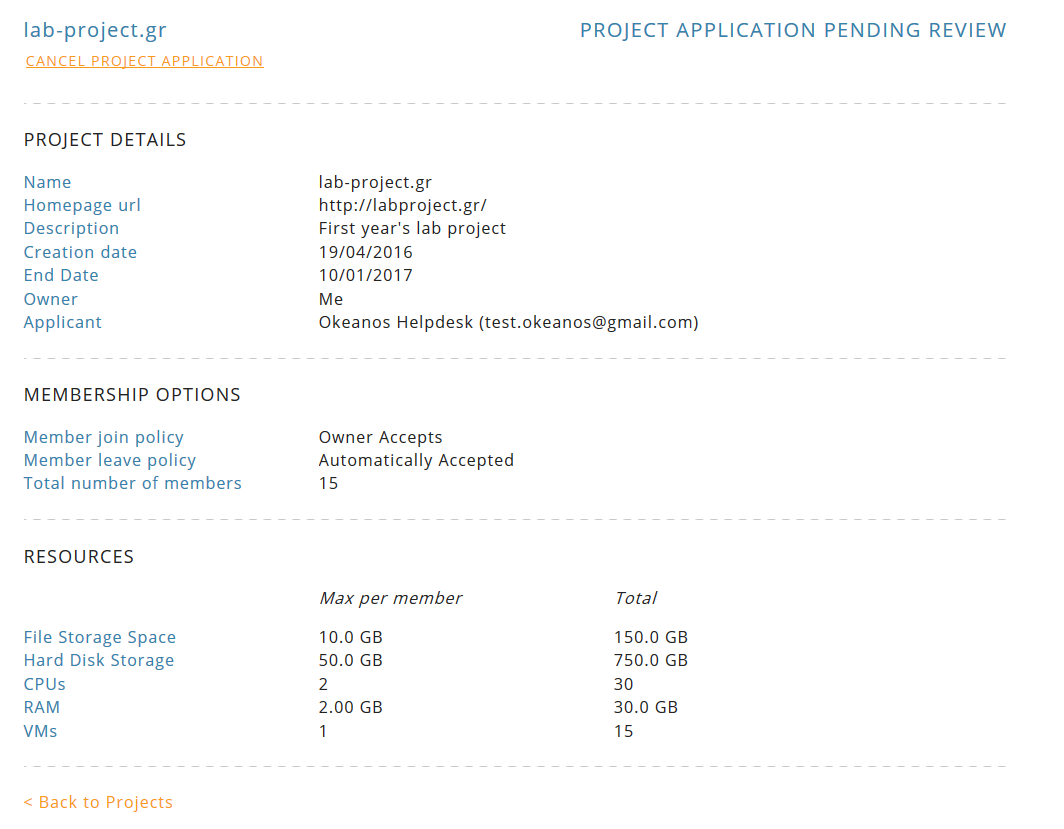
The application will be cancelled after you confirm your action in the dialog that appears.